
A UV bottle printing machine helps businesses print directly or indirectly on bottles, tumblers, cups, jars, cosmetic containers, and cylindrical packaging. The challenge is choosing the right workflow. Some products need direct rotary UV printing. Some are better with UV DTF transfers. Some need labels. Others need a cylindrical printer built for repeat batches. The right choice depends on surface shape, order volume, artwork, durability expectations, and budget.
This guide explains how to choose a UV bottle printing machine for commercial production. It compares direct UV printing, 360 rotary UV printing, cylindrical printers, UV DTF transfer workflows, fixtures, ink, curing, artwork setup, pricing, and sample testing. It is written for promotional product suppliers, drinkware startups, packaging teams, cosmetic brands, print shops, and factories that need short-run bottle decoration.
What Counts as a UV Bottle Printing Machine?
The phrase UV bottle printing machine can describe several production setups. A rotary UV printer prints directly while the bottle rotates. A cylindrical printer is built for round items such as bottles, tubes, cans, and cups. A flatbed UV printer with a rotary attachment may handle some bottle jobs. A UV DTF printer prints transfers that are applied to the bottle later. Each route can be correct in the right situation.
Do not choose a machine only by name. Choose by the bottle type, print area, volume, and finish. A straight aluminum bottle, tapered tumbler, cosmetic jar, glass bottle, plastic tube, and squeeze bottle can all need different handling.
Direct UV Printing vs UV DTF Transfers
Direct UV printing places ink straight onto the bottle or container. This can create a premium look, especially for full-wrap drinkware, cosmetic packaging, and branded promotional products. It requires accurate rotation, correct print height, strong curing, and good adhesion on the product surface.
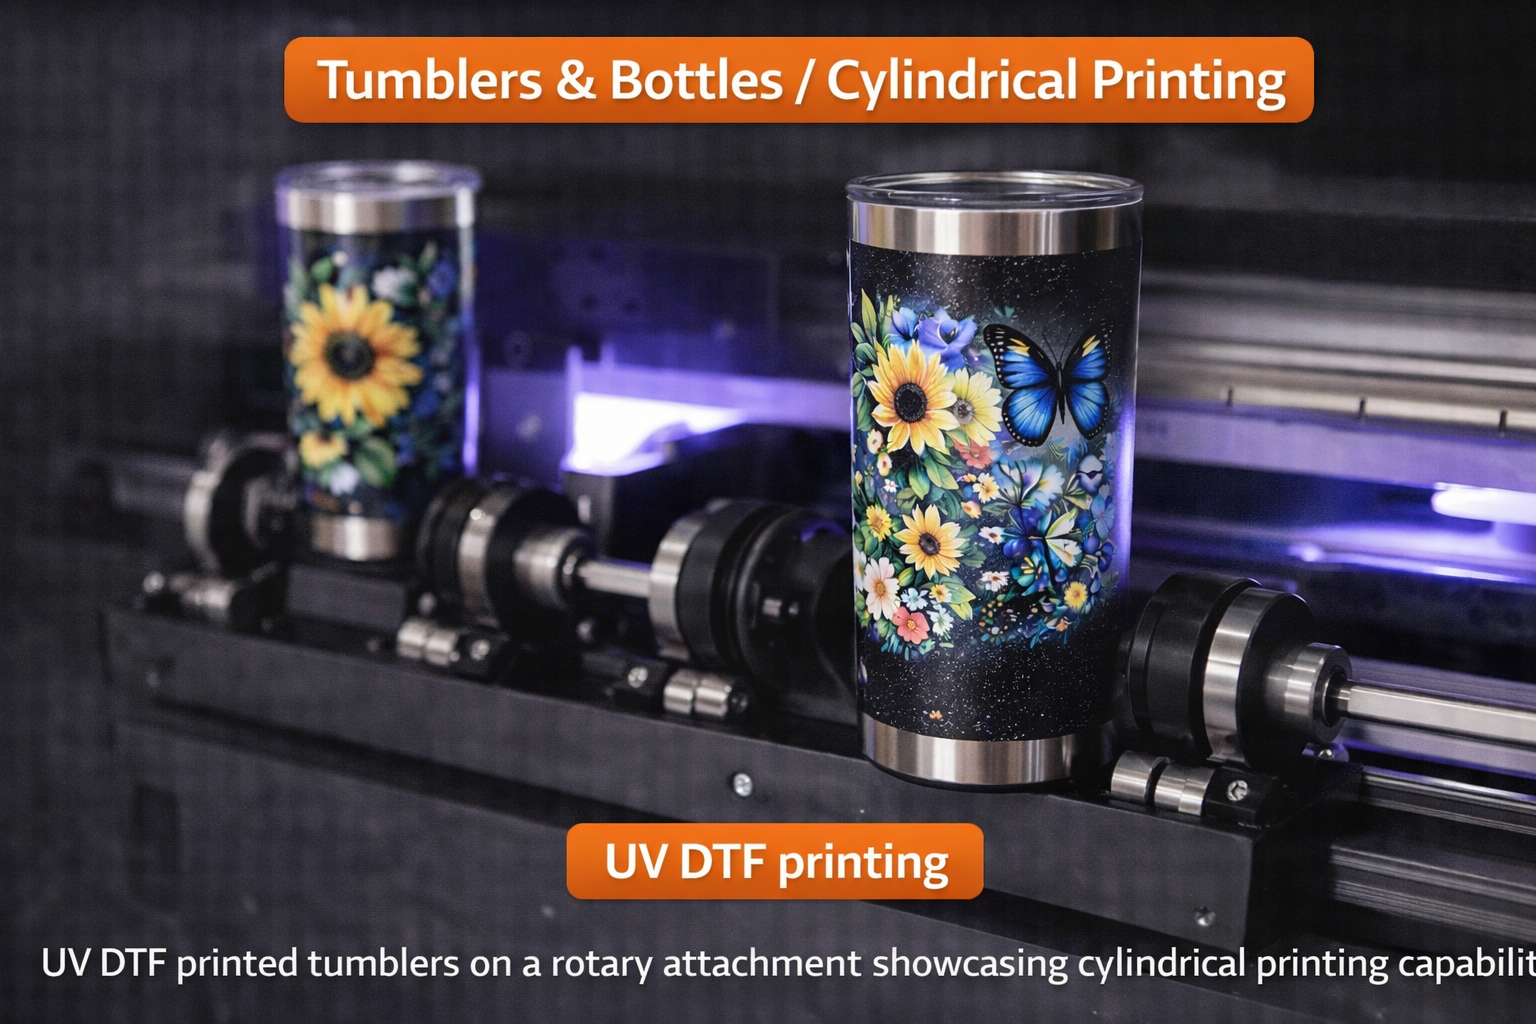
UV DTF printer workflows print onto film first and transfer the design later. This is useful for mixed hard goods, small batches, and products that are hard to fixture directly. The commercial 60cm UV DTF printer guide explains this transfer workflow in more detail.
| Workflow | Best For | Main Advantage |
|---|---|---|
| Direct rotary UV | Bottles, tumblers, cups, tubes, full-wrap graphics | Premium direct print and strong wrap control |
| Cylindrical printer | Round products, cans, straight bottles, startup batches | Dedicated round-object workflow |
| UV DTF transfer | Mixed hard goods, short runs, hard-to-fixture objects | Flexible application after printing |
| Labels | High-volume packaging with repeat designs | Fast for standardized packaging |
When Direct Rotary UV Printing Is Best
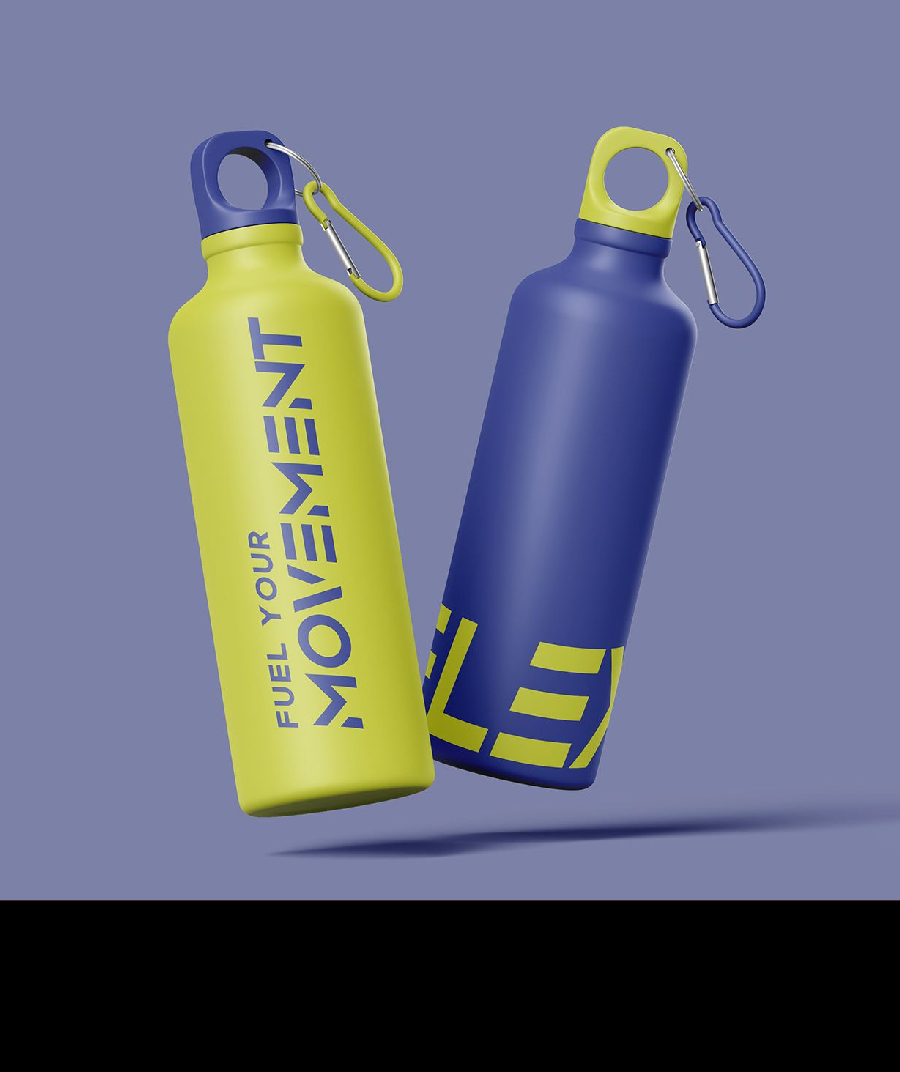
Direct rotary UV printing is the best choice when the bottle itself is the final premium product and the design needs to look integrated. It is especially useful for stainless bottles, sports bottles, glass drinkware, cosmetic packaging, branded tumblers, and promotional bottles. If the design wraps around the object, rotary control is essential.
The 360 rotary UV printer page is the right starting point for this category. The recent 360 rotary UV printer price guide can also help buyers understand fixture, ink, printhead, software, and ROI factors.
When a Cylindrical Printer Makes Sense
A cylindrical printer can be a practical option when the product mix includes bottles, cans, straight tumblers, cups, and tubes. It can be easier to manage than a general flatbed workflow because the machine is designed around round-object handling. For startups, a dedicated cylindrical workflow can reduce setup confusion.
The main limitation is product variation. If bottles have unusual shapes, heavy taper, handles, shoulder curves, or very different diameters, the fixture must be tested carefully. A machine that prints one perfect bottle may still struggle with your actual product catalog.
What About Tapered Bottles and Cups?
Tapered products are more difficult because the circumference changes from top to bottom. A full-wrap design can stretch, drift, or fail to meet at the seam if the artwork and fixture are not prepared correctly. For strong taper, read the guide to a printer for conical surfaces before buying.
If your product line includes tapered tumblers, reusable cups, cosmetic jars, or uneven packaging, send those exact products for sample testing. Do not rely on a supplier sample printed on a straight white bottle.
Ink, White Ink, and Varnish
Bottle printing often needs white ink because bottles may be dark, transparent, metallic, or colored. White ink creates a base for bright color. Varnish can add gloss, texture, and premium effects. These layers improve perceived value, but they also slow production and require maintenance.
Ask how the machine manages white ink circulation, nozzle checks, cleaning, and curing. Weak white ink control can ruin bottle jobs because uneven opacity is easy to see on curved surfaces.
UV Curing and Adhesion
Adhesion is critical for bottles because they are handled frequently. Drinkware is touched, packed, shipped, washed, and sometimes exposed to moisture. Cosmetic packaging is handled by customers and may sit in humid environments. Industrial bottles or containers may face friction during transport.
UV curing must match the material. Glass, coated stainless steel, plastic, powder-coated metal, and cosmetic packaging can behave differently. Always test adhesion after curing and after the product cools. If a primer or coating is needed, include that in production cost.
Artwork Setup for Bottle Printing
Bottle artwork is different from flat artwork. The operator must consider circumference, printable height, seam position, handle position, taper, and safe zones. Fine text and QR codes should be placed where the surface is stable. Full-wrap designs need careful seam planning.
For repeat products, save templates. A template should include bottle diameter, printable area, file size, seam position, white ink settings, curing mode, and fixture setup. This turns a custom job into a repeatable SKU.
Product Categories That Work Well
- Sports bottles, stainless tumblers, and travel mugs.
- Glass bottles for beverage samples and private-label products.
- Cosmetic bottles, lotion jars, tubes, and premium packaging.
- Promotional bottles for events, gyms, schools, and companies.
- Plastic bottles, medicine containers, and sample packaging.
- Short-run branded containers for ecommerce and retail launches.
If drinkware is the main business, also review the tumbler printer page and the cylinder UV printer vs cylindrical printer vs tumbler printer comparison. These pages help match the machine to the revenue model.
Cost Factors for a UV Bottle Printing Machine
Cost depends on machine type, printhead, rotary fixture, ink system, curing system, software, training, and support. Consumables include ink, cleaning supplies, pretreatment if needed, test bottles, rejected blanks, and spare parts. A quote should also include shipping, installation help, and realistic operator training.
The cheapest machine is not always cheaper after reprints. A bottle printer that reduces setup time, protects alignment, and holds products securely can create better ROI than a lower-cost machine that wastes blanks.
How to Price Bottle Printing Jobs
Price should include blank cost, ink, setup, artwork prep, fixture time, curing, inspection, packaging, and waste. A one-color logo on a straight bottle is not the same as a full-wrap design with white ink and varnish. A tapered tumbler is not the same as a straight cosmetic tube.
Build pricing by product type. Track average time per setup and average rejects during the first month. Once you know the real numbers, you can create packages for corporate bottles, personalized drinkware, cosmetic samples, and promotional runs.
Sample Testing Before Buying
Before buying a UV bottle printing machine, send the supplier your real bottle. Include the most difficult artwork you expect to sell: small text, gradients, white ink, solid colors, full-wrap areas, and fine logos. Ask for a short sample run, not just one photo.
Check these points:
- Does the print stay aligned around the curve?
- Does the seam meet acceptably on wrap designs?
- Is white ink dense enough on dark or transparent bottles?
- Does the print pass scratch and handling checks?
- Can the setup be repeated for multiple bottles?
How to Choose Between Bottle Products
Not every bottle product is equally profitable. Straight stainless bottles are often easier than tapered cups. Clear glass may need white ink and careful adhesion checks. Cosmetic bottles can be profitable, but small text and exact logo placement make setup more demanding. Plastic bottles may need surface testing because coatings and flexibility vary widely. A good product menu starts with bottles that are easy to source, easy to hold, and easy to sell at a margin.
For a new shop, it is usually smarter to launch with a small group of repeatable bottle products instead of accepting every custom request. Offer standard bottle sizes, standard print zones, and clear design limits. Once the workflow is stable, add more difficult shapes and premium finishes.
Direct-to-Bottle File Preparation
Artwork preparation is one of the easiest places to lose time. For bottle printing, the file should match the printable area and wrap direction. The operator should know where the seam lands, how far the design sits from the top and bottom, and whether white ink is printed under all colors or only selected areas. If the bottle is transparent, the designer should think about how the design looks with liquid, light, or background objects behind it.
For repeat orders, save templates by bottle model. Include diameter, height, printable area, seam notes, fixture settings, and curing mode. A template turns a difficult first job into a faster second job. It also prevents mistakes when a different operator handles the reorder.
Packaging and Handling After Printing
Even a well-printed bottle can be damaged by poor packing. Let the product cool after curing, inspect the surface, and avoid rubbing freshly printed areas during packing. Use separators, sleeves, or boxes that prevent printed surfaces from scraping against each other. For high-value drinkware and cosmetic packaging, packing quality is part of the customer experience.
If the bottles will be shipped in bulk, test a small packed batch first. Vibration during shipping can reveal issues that are not obvious at the print table. A simple packing test can prevent returns and protect the reputation of the print shop.
Marketing Ideas for Bottle Printing Services
A UV bottle printing machine becomes easier to sell when the shop creates clear offers. Instead of saying “we print bottles,” build packages: corporate onboarding bottles, gym merchandise, wedding drinkware, private-label cosmetic samples, cafe reusable cups, school event bottles, and limited-edition retail packaging. Each package should show sample visuals, quantity ranges, and turnaround expectations.
Internal marketing also matters. Link bottle printing services to related product pages such as tumbler printer, cylindrical printer, and UV DTF printer. This helps visitors choose the right workflow and gives the site stronger topical authority around cylindrical printing.
Maintenance Plan for Bottle Printing
Bottle printing has more moving parts than flat product printing because the product must rotate cleanly. Operators should check the rotary fixture, rollers, product grip, printhead height, nozzle condition, and curing setup before production. Dust or oil on a bottle can create adhesion problems, so cleaning should be part of the job ticket, not an afterthought.
For busy shops, create a daily routine: inspect the fixture, run a nozzle check, confirm white ink, clean test bottles, verify artwork direction, and print one alignment sample. Weekly maintenance should include deeper fixture cleaning, checking belts or rollers, reviewing rejected products, and updating saved templates. This keeps bottle production predictable and reduces emergency troubleshooting.
When to Add a Second Workflow
Many successful shops eventually use more than one decoration method. Direct rotary UV can handle premium wraps. UV DTF can handle mixed hard goods and short-run transfers. A flatbed UV printer can handle acrylic, boxes, boards, and flat merchandise. The best time to add a second workflow is when the current machine is profitable but turning away jobs that clearly belong to another process.
Do not add equipment just because it looks useful. Add it when customer demand, pricing, and workflow notes prove the opportunity. This keeps the shop focused and protects cash flow.
For example, a drinkware shop may start with direct rotary UV printing, then add UV DTF when customers begin asking for small transfers on boxes, lids, acrylic gifts, and mixed promotional kits. A packaging shop may start with UV DTF transfers, then add direct bottle printing when repeat orders justify faster cylindrical production and stronger margins. The cleanest growth path is usually proven by customer demand, not guesswork, and then refined through production data over time consistently enough.
UV Bottle Printing Machine vs Flatbed UV Printer
A UV printer with a flatbed is excellent for rigid flat products, but bottles need rotation. Some flatbed machines can use rotary attachments, which may be enough for occasional bottle work. Dedicated rotary or cylindrical printers are better when bottles are a regular product line.
If your shop prints both bottles and flat items, compare the workflow carefully. You may need a flatbed printer for panels and gifts plus a rotary machine for bottles. A hybrid UV printer is useful for flat and roll work, but round bottles still need the right rotary setup.
Production Workflow for Bottle Orders
- Measure the bottle diameter, height, printable area, and taper.
- Clean or pretreat the surface if required.
- Prepare artwork with seam and safe-zone planning.
- Set the fixture and confirm rotation accuracy.
- Run a test print or alignment strip.
- Print the batch and monitor curing.
- Inspect adhesion, alignment, and finish before packing.
Keep notes for every repeat product. Bottle printing becomes more profitable when the second order is easier than the first.
Buying Checklist
- List bottle materials: glass, plastic, stainless steel, coated metal, or cosmetic packaging.
- Measure diameter, length, taper, and printable height.
- Confirm whether you need full-wrap or partial-logo printing.
- Ask about rotary fixture range and stability.
- Confirm white ink circulation and varnish support.
- Request samples on your real products.
- Check RIP software and artwork template support.
- Ask for maintenance, training, warranty, and spare-parts details.
Common Mistakes
Buying From a Perfect Sample Only
A perfect showroom sample may not match your product. Test your real bottle, coating, and artwork.
Ignoring Taper
Taper changes wrap behavior. If your bottles are not straight cylinders, test them before purchase.
Underpricing Setup Time
Bottle printing needs measuring, alignment, and inspection. Include that labor in the selling price.
Choosing the Wrong Workflow
Direct UV, UV DTF, labels, and cylindrical printing all have a place. Pick the method that fits the product and order volume.
FAQ
Can one machine print all bottle types?
No single setup is perfect for every bottle. Straight cylinders, tapered bottles, glass, plastic, and coated metal should all be tested separately.
Is UV DTF better than direct UV bottle printing?
UV DTF is flexible for mixed products and short runs. Direct rotary UV is usually better for premium full-wrap bottle printing and repeat drinkware production.
Do bottles need pretreatment?
Some materials may need cleaning, primer, or coating. Test adhesion before selling large batches.
What is the best machine for tumblers?
For regular drinkware production, compare a tumbler printer, cylindrical printer, and 360 rotary UV printer using your exact blank products.
Bottom line: the best UV bottle printing machine is the one that fits your bottle shape, surface, artwork, volume, and pricing model. Test real products, compare direct UV and UV DTF honestly, and build a repeatable workflow before scaling orders.