
Quick answer: A visual positioning UV printer uses a camera system to locate objects on the print bed and align artwork to their real position. This helps shops reduce fixture making, manual measuring, and wasted samples when printing short runs, mixed objects, irregular shapes, and frequent custom orders.
The biggest value is not the camera by itself. The value is what the camera removes from production: repeated jig building, slow manual alignment, trial prints, and operator guesswork. For print shops handling personalized products, small batches, samples, and irregular flatbed work, a visual positioning UV printer can turn setup time into selling time.
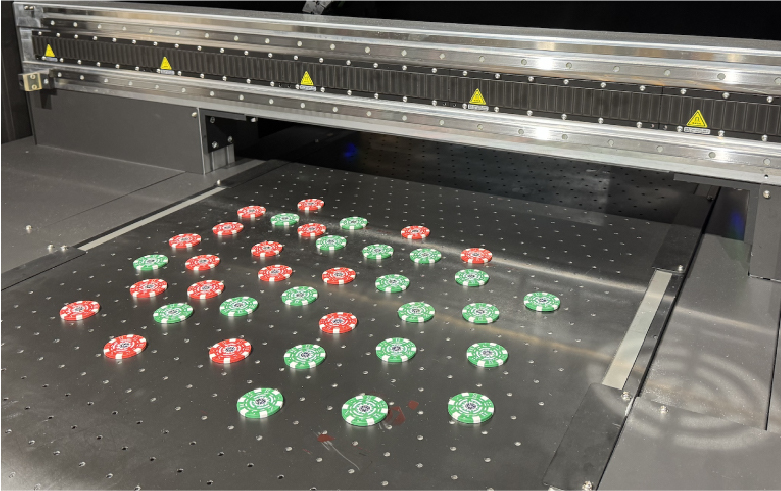
Why visual positioning matters in UV printing
Traditional flatbed UV printing depends on accurate placement. If the item is a rectangular board, alignment is easy. The operator places the board against a guide, loads the file, checks the origin, and prints. The challenge starts when the job includes shaped acrylic pieces, phone cases, badges, leather patches, medals, nameplates, small gifts, tools, or mixed samples that do not sit in a perfect grid.
Without camera alignment, shops usually solve this by building jigs. A jig holds each item in an exact position so the artwork lands correctly. Jigs are excellent for repeat production, but they slow down custom work. If a customer wants 40 different parts, five sample shapes, or a one-time promotional batch, the jig can cost more time than the print.
A visual positioning UV printer reduces that friction. The camera reads the object position, the software matches artwork to the detected area, and the print file can be aligned without a custom fixture for every job. That does not mean jigs disappear forever. It means the shop has a faster option when the job does not justify a dedicated fixture.
Best use cases for camera alignment
Personalized products
Personalized work is profitable because customers pay for uniqueness. It is also operationally messy because each item may have a different name, graphic, logo, or placement. A visual positioning UV printer helps operators keep those small differences organized without measuring every item by hand.
Irregular flat objects
Irregular objects are the natural fit. Acrylic cutouts, badges, shaped tags, molded parts, and promotional blanks rarely share the same geometry. Camera alignment can locate the printable area and help reduce misprints caused by placement drift.
Short-run samples
Sampling speed affects sales. When a shop can prepare a sample without building a jig, the buyer sees output faster. This is useful for agencies, packaging teams, product designers, and brand owners who need quick visual proof before a larger order.
Mixed-product batches
A single print bed may hold several product types when the order is small. Manual alignment becomes slow because every item needs its own origin. Visual positioning helps organize that mixed-bed workflow so the operator can use bed space more efficiently.
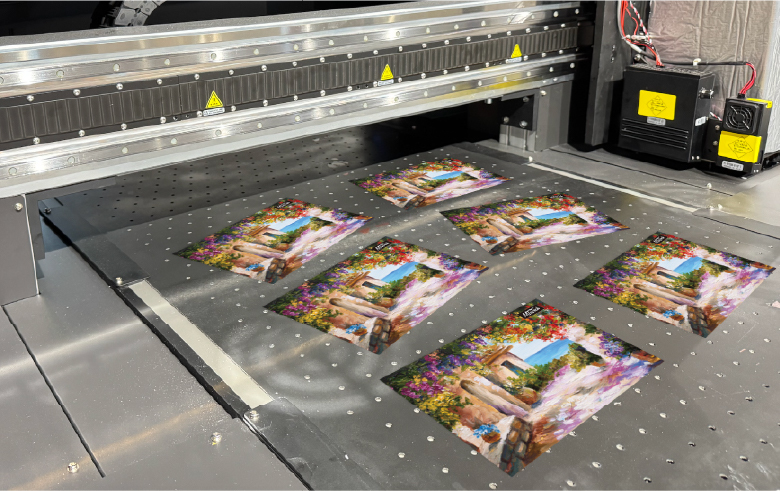
How the visual positioning workflow works
The exact software process can vary by model, but the production logic is consistent. The operator places objects on the bed, captures the bed area with the camera, aligns or maps artwork to the detected object positions, confirms the preview, and starts printing. The machine still needs correct height, surface prep, ink settings, and curing. The camera improves alignment; it does not replace basic UV printing discipline.
Step 1: Prepare the surface
Clean the object before alignment. Dust, oil, film, and static can affect adhesion and print quality. Surface preparation also prevents small objects from moving during loading. Camera alignment cannot fix poor adhesion or shifting items.
Step 2: Place objects with enough spacing
Camera systems need visible separation and a clear printable area. Overlapping objects or crowded layouts can make detection harder. Leave enough spacing for safe head movement and visual recognition.
Step 3: Capture the bed image
The camera captures the objects as they sit on the bed. This gives the operator a real view rather than relying only on a digital template. The software can then align artwork to the actual object position.
Step 4: Match artwork to the object
Artwork should already be prepared at the right size, color mode, and layer structure. The camera helps with placement, but it does not rescue poor file preparation. Keep cut lines, white ink layers, and varnish layers named clearly.
Step 5: Confirm the preview
Operators should check the preview before printing. Look for rotation errors, wrong orientation, bleed issues, and artwork that sits too close to an edge. A 20-second preview check can save a full bed of wasted blanks.
Visual positioning vs manual jigs
Jigs still have a place. For high-volume repeat jobs, a well-made jig can be faster because loading becomes extremely predictable. Visual positioning is stronger when the job changes often. The right production setup may use both methods.
| Job type | Best method | Why it works |
|---|---|---|
| One-off samples | Visual positioning | Less setup time and no fixture cost |
| Mixed custom objects | Visual positioning | Artwork can be aligned to real item placement |
| Repeat order with hundreds of identical parts | Manual jig | Fast loading and consistent repeat placement |
| Prototype to production transition | Both | Use camera for sample approval, then jig for volume |
This is why a camera-equipped system should be evaluated by order type. If the business sells one-off customization, visual positioning can reduce labor. If the business mainly prints the same part every day, the camera is useful but not the main driver of efficiency.
Where visual positioning fits in the MTuTech product path
The Visual Positioning UV Printer is the most direct fit for camera-assisted alignment. Buyers should compare it with the UV Printer 9060 when they need smaller flatbed production, and with the industrial UV printer category when they need a larger bed for panels and production work.
If the work includes both rigid and flexible media, the hybrid UV printer may be the better production platform. If the work is cylindrical, visual positioning on a flatbed is not the right replacement; compare dedicated options such as the cylinder UV printer or 360 rotary UV printer.
File setup for camera-assisted UV printing
Good file preparation is still the foundation. Camera alignment helps the file land in the right place, but the file must be production ready. The most common problems are wrong scale, missing white ink layers, low-resolution logos, artwork placed too close to edges, and inconsistent naming between the design file and the RIP.
Use a clear safe zone
Do not place critical text or logos at the absolute edge of the object. Even with accurate visual positioning, small differences in object shape, bevels, or surface height can affect the final look. A safe zone gives production some room to breathe.
Prepare white ink intentionally
White ink is important on clear, dark, metallic, and colored substrates. Decide whether white is needed as an underbase, spot layer, or highlight. Do not leave the operator to guess from the artwork preview.
Separate varnish as its own effect
Varnish can create gloss or texture, but it changes print time and curing behavior. Use it when it adds value. For simple samples, skipping varnish may improve speed and reduce cost.
Quality checks before sending the job to a customer
Short-run work can move fast, which makes quality checks more important. A visual positioning UV printer reduces setup risk, but it should still be paired with a simple inspection routine.
- Check registration on the first item before running the full bed.
- Confirm that the artwork is upright and aligned to the customer’s expected viewing direction.
- Inspect adhesion after curing, especially on glass, metal, acrylic, and coated plastics.
- Review white ink opacity under normal lighting, not only under the shop lights.
- Photograph approved samples for repeat orders and customer sign-off.
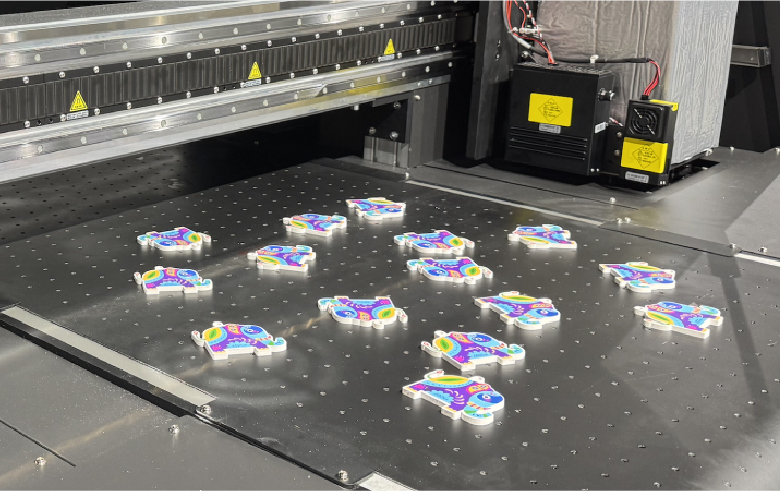
ROI: where the savings come from
The ROI of visual positioning is usually labor-driven. The printer may save material by reducing misprints, but the larger gain is setup time. When a job no longer needs a custom jig, the operator can move from artwork to production faster. That speed matters most when the shop sells many small orders.
Think about the hidden cost of a simple fixture. Someone has to measure the object, design the jig, cut or print the fixture, label it, store it, and find it again when the customer reorders. If the order is large and repeatable, that effort is worth it. If the order is short-run or experimental, visual positioning may be the better route.
The second ROI source is sales response time. Faster samples can help close jobs. A customer who sees a real printed object quickly is more likely to approve the project. This is especially useful for corporate gifts, product launches, branded merchandise, retail packaging, and seasonal campaigns.
Buying checklist for a visual positioning UV printer
Before buying, review the full production environment rather than the camera alone.
- What is the maximum object size and bed area you need?
- How often do jobs change shape, size, or artwork?
- Do you print clear, dark, or colored materials that require white ink?
- Do you need varnish or raised effects for premium products?
- Can operators follow a preview and inspection process consistently?
- Will the machine support your current file preparation and RIP workflow?
If the shop answers yes to frequent job changes, short-run samples, and custom objects, visual positioning deserves serious attention.
Industry examples where visual positioning pays off
Visual positioning is easiest to justify when the shop can name the jobs that waste time today. The strongest use cases usually share one pattern: the product value is good, but setup eats profit. Camera alignment helps when the product changes too often for traditional fixtures to stay efficient.
Corporate gift suppliers
Corporate gift work often includes small batches with names, departments, event dates, or location-specific logos. The same bed may hold power banks, acrylic awards, leatherette tags, and metal cards. A visual positioning UV printer helps the operator place those objects quickly and print accurately without building a separate jig for every variation.
Packaging prototype studios
Prototype teams need speed. A brand may want to see a logo on several lid shapes, sample inserts, or display pieces before selecting the final design. Camera alignment lets the team print the test object directly, photograph it, and send the proof faster. That speed can shorten the approval cycle.
Repair, replacement, and industrial marking
Some shops print markings on parts that arrive in inconsistent batches. Nameplates, control panels, tooling labels, and replacement covers may not justify a permanent jig. Visual positioning helps create a controlled process for these short runs while keeping the option to build a jig later if demand repeats.
Operator training for camera-assisted UV printing
The camera can make setup easier, but the operator still needs judgment. Training should focus on what the system sees, what it does not see, and when a traditional jig is still smarter. A good operator learns to create enough contrast for detection, leave safe spacing, confirm orientation, and inspect the preview carefully.
Train operators to read the preview
The preview is where most mistakes can be caught cheaply. The operator should confirm that artwork is not mirrored, rotated, scaled incorrectly, or placed too close to an edge. This is especially important for text, logos, QR codes, serial numbers, and directional graphics.
Use sample photos as a production record
Every approved job should have a sample photo with the product, artwork, placement, and customer name. This gives the team a reference when the customer reorders. It also helps sales explain placement limits before a design reaches production.
Know when to switch back to a jig
If the same object repeats in high volume, a jig may still be faster. The best shops treat visual positioning and jigs as complementary tools. Use the camera for discovery, samples, mixed batches, and short runs. Use jigs for stable repeat production.
SEO and content role for this topic
From a search strategy point of view, visual positioning deserves its own page because the buyer intent is different from a broad flatbed UV printer query. A buyer searching for camera alignment, jigless UV printing, or visual positioning is not just asking for a printer. They are trying to solve setup labor, accuracy, and short-run production problems.
That is why this guide links directly to the Visual Positioning UV Printer page while also pointing to broader flatbed and industrial UV printer options. Clear internal linking prevents keyword cannibalization and helps the correct product page act as the commercial destination.
Metrics to track after adding visual positioning
After the machine is installed, track numbers that show whether the camera workflow is actually improving production. Do not judge the system only by one impressive demo. A better measurement window is the first 30 to 60 days of real orders.
| Metric | Why it matters | What improvement looks like |
|---|---|---|
| Average setup time | Shows whether camera alignment is replacing manual measuring | Shorter setup for samples and mixed batches |
| Reprint rate | Shows whether placement errors are decreasing | Fewer misaligned objects and fewer wasted blanks |
| Sample approval speed | Connects production speed to sales performance | Customers receive proofs faster |
| Jig creation hours | Reveals hidden labor savings | Less fixture work for one-off and short-run jobs |
These metrics also help decide when to use visual positioning and when to build a jig. If a product repeats every week, a jig may still win. If the product changes every order, camera alignment should keep gaining value.
How Visual Positioning Supports Commercial Page Authority
This article should act as the practical support page for camera alignment searches, while the visual positioning UV printer page remains the commercial destination. That separation matters for ranking. Informational users can learn when camera alignment helps, and qualified buyers can move to the machine page when they are ready to compare features, sample needs, and pricing.
The strongest internal-link path is simple: camera alignment guide to visual positioning product page, then to UV Printer 9060, applications, and contact MTuTech. This helps Google understand that the guide supports the commercial page rather than competing with it.
That same path also helps sales users. A visitor who learns why camera alignment matters should not be left at an educational dead end. The article should move them toward machine review, sample testing, and direct inquiry.
FAQ
Does visual positioning remove the need for jigs?
It reduces the need for jigs on short-run and irregular jobs. For high-volume repeat production, jigs can still be faster.
Can visual positioning improve print quality?
It improves placement accuracy. Overall print quality still depends on file quality, head height, ink settings, surface preparation, and curing.
Is a visual positioning UV printer good for phone cases and badges?
Yes. Phone cases, badges, tags, small gifts, and shaped promotional items are strong use cases because placement changes often.
What should I compare next?
Start with the Visual Positioning UV Printer, then compare bed size and output needs with the UV Printer 9060 and larger industrial UV printer options.