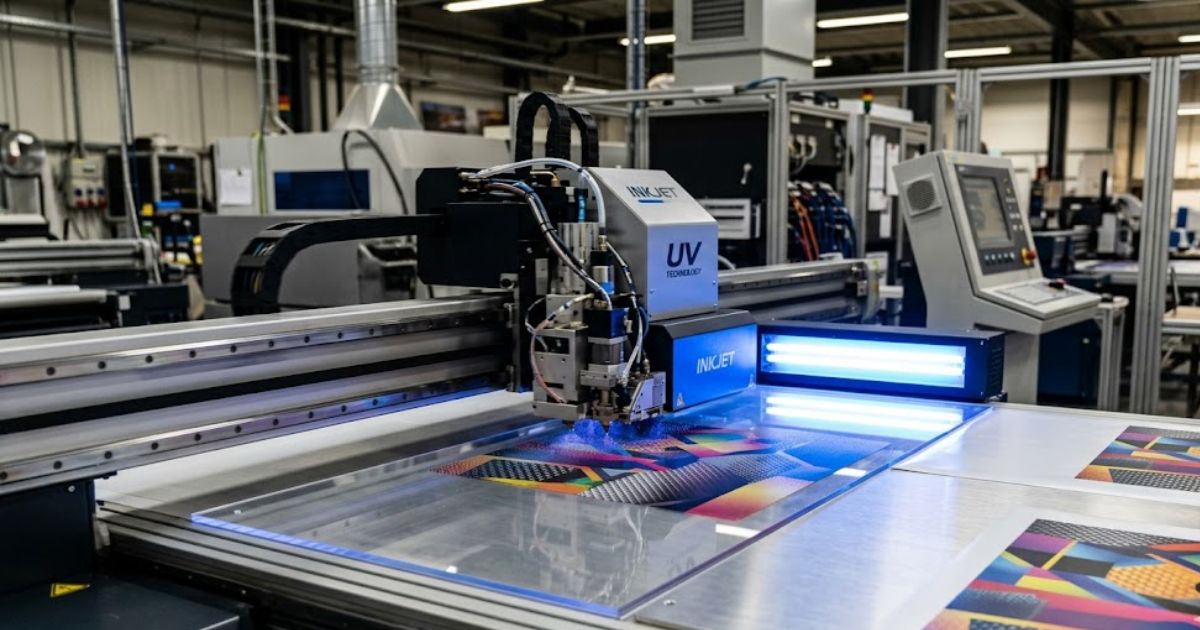
What Are the Most Common UV Printer Problems?
Print Head Clogging and Nozzle Blockage Issues
Clogging stops ink flow restriction inside tiny ink channels. Nozzle blockage happens when dried UV ink hardens in the print head. We’ve seen blocked channels reduce output quality within hours of idle time. Most blockage starts during overnight pauses when ink settles and begins polymerizing. Regular flushing prevents buildup in narrow pathways. Temperature changes speed up channel restrictions in cold shops.
Banding Lines, Missing Passes, and Uneven Ink Distribution
Banding creates visible stripes across your print surface. Missing passes leave gaps where the head skipped its programmed path. Uneven ink distribution produces light and dark zones that ruin line accuracy. We check motion consistency first when banding appears on finished pieces. Mechanical drift throws off pass overlap timing between head movements. Belt tension directly affects how smoothly the carriage tracks across acrylic or glass. Encoder strips gather dust and disrupt position feedback to the controller.
UV Ink Adhesion Failure on Acrylic, PVC, Glass, and Metal
Adhesion strength varies wildly across material compatibility ranges. PVC accepts UV ink easily while metal surface prep. Surface energy determines whether ink bonds or beads up on glass substrates. We test adhesion by scratching cured ink with a fingernail after printing. Low energy materials reject ink during the curing cycle. Flame treatment raises surface tension on smooth plastics before printing starts.
What Causes UV Printer Errors and Print Defects?
UV printer errors stem from specific root causes inside your machine. System failures follow a clear cause effect relationship that we can trace. Understanding fault classification helps you spot patterns before print defects multiply across jobs.
Ink Viscosity Changes, Pigment Settling, and Expired UV Ink
Ink viscosity shifts when temperature drops in your print room. Pigment settling happens after bottles sit unused for weeks between projects. Expired UV ink loses its chemical degradation resistance and clogs fine pathways. We’ve watched thick ink miss nozzles completely during cold winter mornings. Flow stability depends on consistent storage conditions away from direct sunlight. Old ink separates into layers that won’t remix without vigorous shaking. UV ink shelf life ends faster when containers stay partially open between runs.
Incorrect Print Head Height, Alignment Drift, and Motion Errors
Print head height needs exact Z-axis tolerance above each substrate surface. Alignment drift throws off registration between color layers during long runs. Motion errors appear when the linear motion system skips steps under heavy acceleration. We measure height with feeler gauges before starting production batches on thick materials. Mechanical drift builds up from loose belts that stretch over months of use. Carriage wobble creates registration shifts that ruin multi-pass prints across wide formats.
Lamp Power Loss, Incorrect Exposure Time, and Speed Mismatch
UV lamp power drops as bulbs age past their rated lifespan hours. Incorrect exposure time leaves ink tacky when print speed runs too fast. Speed mismatch breaks the energy speed dependency needed for complete polymerization. We check energy output with UV meters monthly to catch declining lamp performance. Fast speeds need higher lamp intensity to deliver enough cure timing per pass. Bulbs lose strength gradually so you won’t notice until adhesion fails suddenly.
Temperature Fluctuation, Humidity Levels, and Dust Contamination
Temperature fluctuation changes how ink flows through heated print heads during shifts. Humidity levels affect static charge buildup on plastic sheets feeding through rollers. Dust contamination lands on wet ink before curing completes under lamps. We maintain environmental stability by keeping shops between 68 and 72 degrees year-round. High moisture creates contamination risk when water condenses inside ink supply lines overnight. Airborne particles stick to tacky surfaces and create permanent texture defects.
How Do You Fix UV Printer Problems Step by Step?
UV Printer Repair requires clear troubleshooting steps that follow procedural accuracy. Risk reduction comes from knowing exactly which fix to apply first. Following proven methods prevents damage while restoring your machine to full production speed.
Clean and Recover a Clogged UV Print Head Safely
Print head recovery starts with manufacturer approved cleaning solution applied at room temperature. Safety protects delicate nozzle integrity from harsh solvents that dissolve protective coatings. We soak stubborn clogs for ten minutes before attempting any manual wiping. Gentle blotting with lint free swabs removes softened residue without scratching firing chambers. Forced air pressure can crack internal ceramic plates if you exceed recommended PSI. Running test patterns after cleaning confirms all jets fire properly before resuming paid work.
Eliminate Banding and Improve Line Accuracy
Banding correction demands precise pass alignment between each head movement across the bed. Line precision improves when you calibrate uv printer motion calibration settings inside your RIP software. We measure actual print position against programmed coordinates using registration marks on test sheets. Encoder strip cleaning removes dust that throws off position feedback during fast passes. Belt tension adjustment stops carriage bounce that creates repeating pattern defects. Bi-directional alignment fixes offset between left and right printing directions on the same layer.
Improve UV Ink Adhesion on Different Substrates
Substrate treatment changes based on what material you’re printing today. UV ink bonding needs proper surface preparation matched to each sheet’s energy level. We flame treat smooth plastics for three seconds to raise their receptiveness before loading. Adhesion strength multiplies when you wipe surfaces with isopropyl alcohol to remove oils. Primers designed for specific materials create mechanical teeth for ink to grip. Testing scratch resistance on sample pieces prevents wasted production runs with peeling graphics.
Correct Color Output Using ICC Profiles and Calibration
ICC profiles translate file colors into accurate machine output through mathematical mapping. Color calibration maintains color consistency across different batches of material and ink. We create custom profiles using spectrophotometers that measure actual printed color patches. Output accuracy drifts when lamp intensity changes or new ink lots arrive at your shop. Loading the wrong profile for your current substrate causes immediate color shifts. Monthly calibration catches gradual changes before customers notice mismatched repeat orders.
Adjust UV Lamp Power and Curing Parameters
UV lamp wattage needs adjustment when switching between thick and thin ink layers. Curing parameters balance exposure balance against production speed for complete polymerization. We increase lamp intensity by 15 percent when printing white ink bases under color. Lower power settings prevent substrate warping on thin films sensitive to heat buildup. Controlled energy management means matching lamp output to the ink’s photoinitiator requirements. Monitoring cure with adhesion tests prevents under cured prints from smearing during handling.
Which UV Printer Maintenance Procedures Prevent Printing Errors?
Preventive maintenance stops problems before they shut down your production schedule completely. UV printer servicing at the right frequency keeps your machine running with maximum reliability. We schedule weekly checks that catch small issues before they turn into expensive repairs.
Daily nozzle checks reveal early signs of partial blockages that worsen overnight. Wiping the capping station every morning removes dried ink buildup that prevents proper sealing. We flush ink lines at the end of each shift to stop pigment from settling inside supply tubes. Weekly encoder strip cleaning maintains accurate carriage positioning across the entire print bed. Monthly lamp intensity testing catches declining UV output before cure failures start appearing on finished prints. Quarterly belt tension adjustments prevent mechanical drift that throws off registration between color layers.
Why Choose Professional UV Printer Technical Support?
Technical support saves hours of guessing when complex problems stop your production mid job. Expertise from trained technicians identifies root causes faster than trial and error troubleshooting methods. Downtime reduction happens when specialists diagnose issues correctly on the first visit instead of replacing random parts. UV printer service from Mtutech Printer brings diagnostic tools most shops don’t own for checking lamp output or head voltage. Experienced techs spot patterns across hundreds of machines that reveal hidden mechanical wear.
We’ve watched professionals fix alignment drift in twenty minutes that took us three days alone. Phone support walks you through emergency fixes when deadlines can’t wait for scheduled visits. Professional UV printer technical support provides access to firmware updates and factory calibration data unavailable in user manuals. Certified technicians carry manufacturer approved replacement parts that fit perfectly without modification or compatibility guessing. Remote diagnostics through screen sharing lets experts see your exact error messages and machine behavior. Training from service visits teaches your team prevention strategies that reduce future emergency calls. Mtutech Printer specialists document every repair with photos and notes for warranty protection and insurance claims.
FAQs
Why does UV ink peel or crack after printing?
UV ink peels when curing settings are wrong. We check lamp power and speed first. Poor surface prep also causes this. We always clean substrates before printing for best adhesion.
How often should UV print heads be cleaned?
We clean UV print heads daily for best results. Weekly deep cleaning prevents nozzle clogs. Our technicians recommend monthly professional maintenance. This keeps your UV flatbed printer running smoothly.
What causes horizontal banding on UV printers?
Horizontal banding happens from clogged nozzles or misaligned heads. We run nozzle checks first. Print speed and ink flow also matter. Our team fixes banding issues the same day.
Can incorrect UV curing damage materials?
Yes, wrong UV curing damages many substrates. Over curing causes warping and yellowing. Under curing leaves sticky prints. We adjust LED lamp settings for each material type carefully.
When should UV printer errors be handled by technicians?
Call technicians for repeated error codes or hardware failures. We handle software glitches and sensor problems fast. Major print head issues need expert repair. Our certified team offers 24/7 UV printer support locally.
Need Technical Support for Your UV Printer?
UV printer support from Mtutech Printer delivers immediate help when production stops unexpectedly during rush jobs. Our diagnostics pinpoint exact failure points using specialized testing equipment and years of field experience. Repair services restore your machine to factory specifications with genuine replacement parts and calibrated settings. Professional assistance includes remote troubleshooting for urgent fixes and scheduled on site visits for complex mechanical issues. We provide documentation of every service call to track patterns and prevent recurring failures. Contact Mtutech Printer today for expert UV printer support that gets your equipment back online fast.