DPI (dots per inch) is not just a quality setting. It directly controls your ink consumption, throughput per shift, and gross margin on every job. Wrong print resolution choices raise your cost per m² without any warning. We have watched shops lose production margin protection simply because nobody matched resolution profiles to job type matching needs.
Poor RIP software configuration causes silent cost leakage across every single run. Skipping background ink reduction means you ignore easy smart background compression savings every day. Bad ICC profile calibration breaks color delta E consistency fast. No dot gain compensation damages gradient smoothness on every printed sheet.
What Does DPI Actually Control in UV Inkjet Systems?
DPI goes beyond simple dot placement density. It controls where each dot lands on the raster grid. We’ve seen how inter dot spacing shifts the entire print quality. Wrong spacing creates edge aliasing that ruins clean lines. Think of it like placing tile gaps matter as much as the tiles themselves.
Spatial dot frequency shapes how droplet size in picoliters builds each ink layer. We’ve watched dot overlap ratio directly affect gradient smoothness and microtext readability. The printhead native resolution sets the geometry, not just the count. Tight dot placement geometry sharpens edge sharpness and protects line fidelity across every print.
DPI in UV Printing Explained
DPI Decision That Affects Every Single Print Run
DPI (dots per inch) is not a fixed number. It changes per job, per surface, per need. Here is what every print decision connects to:
- Wrong dot placement drains your cost per m² silently.
- Large format prints work fine at the 300 DPI range.
- Medium detail prints need careful resolution matching to avoid waste.
- High detail prints require the 600 DPI range or 1200 DPI range.
- Bad printhead resolution breaks output quality before printing starts.
- Ink consumption rises fast without proper job type selection.
- Viewing distance decides how much dot density you actually need.
- Print sharpness drops when substrate type and settings don’t match.
- Poor RIP software settings destroy production efficiency quickly.
How DPI Affects Throughput and Cost in UV Printing
DPI Is a Cost Dial, Not Just a Quality Setting
Most production managers treat DPI settings like a quality dial. They turn it up on every job without checking the real cost. Higher pass count drops your throughput per shift fast. More passes burn more ink, and your ink consumption climbs without warning. We tracked one shop losing 18% on gross margin just from mismatched resolution profiles on simple large format jobs.
Wrong DPI settings raise your cost per m² on every single run. Unmatched job type matching means you use high ink density where flat backgrounds need low coverage. Smart shops use background ink reduction and smart background compression to cut waste. RIP software configuration controls how your machine reads each file. Fixing it protects your production margin protection before cost leakage starts silently.
Which Technical Variables Influence Perceived Print Quality Beyond DPI?
Substrate Properties
Surface roughness measured by Ra value changes how dots spread on landing. High porosity pulls ink unevenly, breaking dot spread geometry fast. We’ve tested materials where surface energy in dyn/cm dropped and dots bled sideways badly. Coating chemistry and ink absorption rate decide if your DPI setting even matters.
Ink Formulation
Pigment concentration shifts how ink stacks at high DPI runs. We’ve seen viscosity in cP climb under tight dot spacing, creating ink stacking stress. Surface tension pulls droplets apart before they bond cleanly. Adhesion promoters and oligomer content control whether that stress cracks the layer later.
UV Curing Parameters
Higher DPI builds more ink density, which raises curing density needs per pass. UV LED wavelengths between 365 and 395nm must match polymerization depth precisely. We’ve noticed oxygen inhibition weakens surface bonds when cure intensity in mW/cm² runs too low. Too much power increases cross link density and makes layers brittle fast.
RIP and Dithering Algorithms
Perceived sharpness often comes from stochastic screening, not raw dot count. A smart halftoning algorithm with a calibrated ICC profile outperforms brute force DPI every time. We’ve run tests where raster interpolation alone lifted visual quality without touching resolution. Dialing in dot gain compensation keeps edges clean across every substrate type.
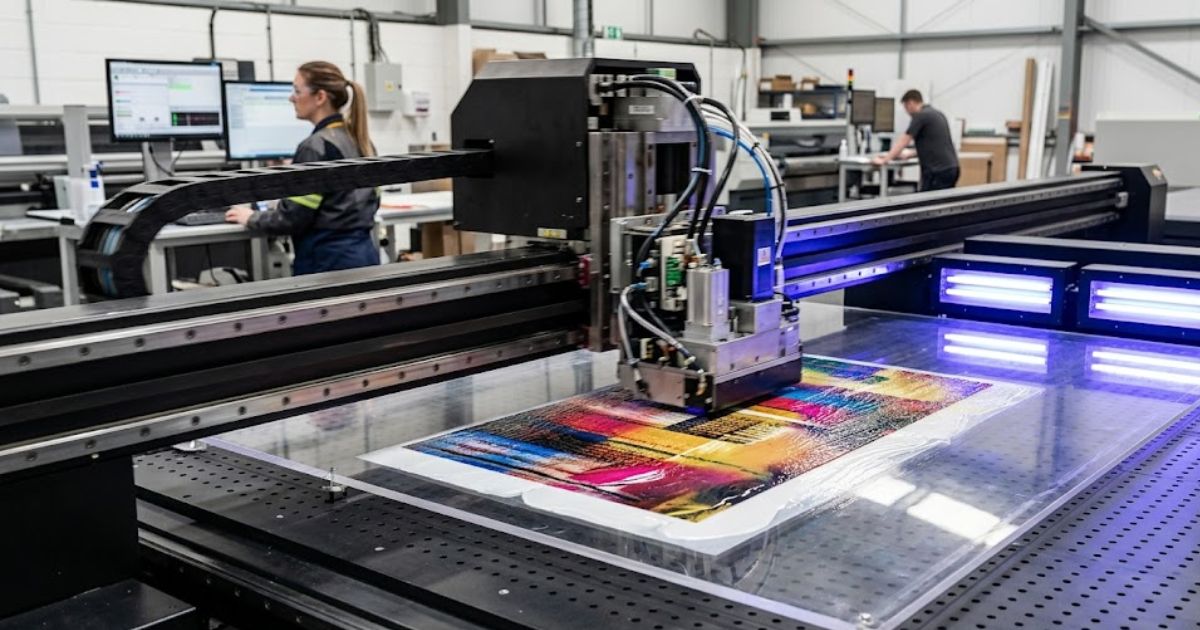
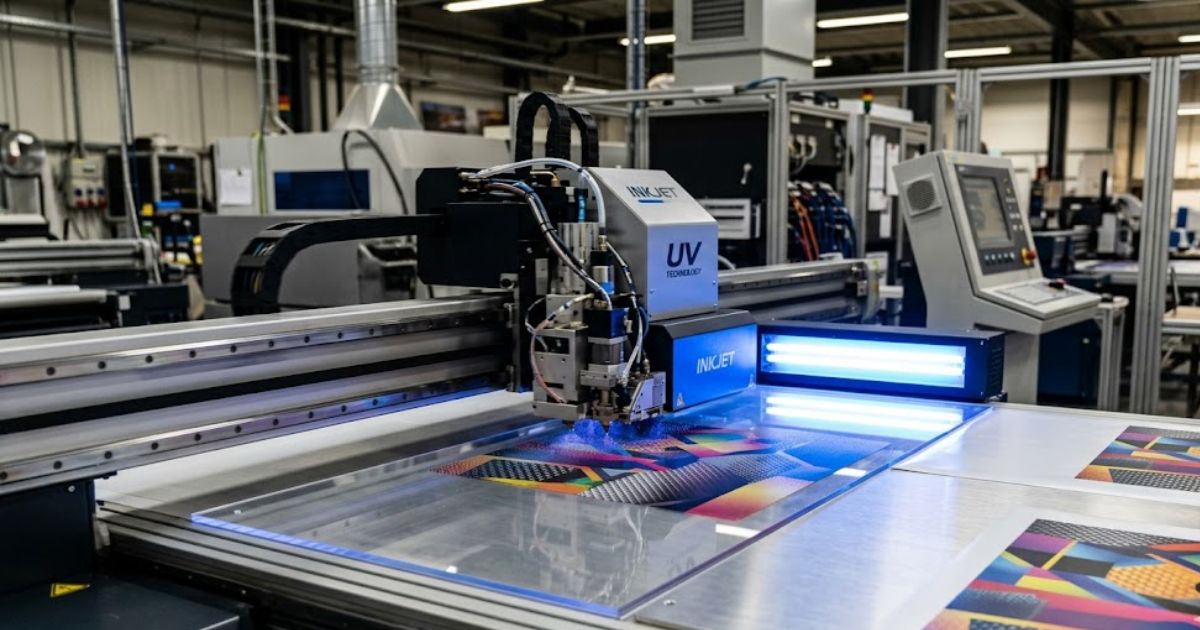
How Does DPI Interact with Droplet Size and Printhead Technology?
Software DPI settings never override the native resolution locked inside the hardware. A binary vs grayscale printhead handles dot placement in completely different ways. We’ve tested the Ricoh Gen6 and watched its variable droplet technology shift droplet volume scaling smoothly across detail levels. Nozzle density sets the physical ceiling that no software setting can push past.
Fire frequency measured in kHz controls how fast dots hit the substrate per second. The Kyocera KJ4A handles high fire frequency without dot placement drift, which we’ve confirmed across long runs. Epson i3200 delivers strong multi-level grayscale impact on detailed gradient work cleanly. Matching hardware native resolution to job type protects output quality without forcing extra passes.
When Should You Use 720 DPI, 1000 DPI, or 1440 DPI in UV Printing?
Create Application Based Matrix:
| Application | Viewing Distance | Recommended DPI | Reason |
| Packaging prototypes | Close | High | Edge fidelity |
| Industrial panels | Mid range | Medium | Balance |
| Outdoor signage | Far | Low-Mid | Throughput priority |
Quick DPI Selection Guide
Pick the Right DPI for Every Job Type
The right DPI is never the highest number. It is the lowest that satisfies viewing distance without hurting your margin.
| Job Type Matching | DPI Range | Viewing Distance | Ink Consumption | Reprint Risk | Production Efficiency |
| Outdoor signage | 300 DPI range | 10 ft and beyond | Lowest | Low | Best |
| General prints | 720 DPI range | 3 to 6 ft | Moderate | Low | Good |
| Packaging prints | 600 DPI range | 1 to 3 ft | Moderate | Medium | Good |
| Close viewing prints | 1440 DPI range | Under 1 ft | Highest | High | Low |
| Large format output | 1000 DPI range | 6 ft and beyond | Low | Low | High |
How Do Hybrid DPI Strategies Improve Production Efficiency?
Most shops run one DPI setting across the whole print. That wastes ink badly on plain background areas every single job. Zonal rasterization fixes this by splitting the print into detail zones smartly. We’ve applied selective resolution mapping and watched background ink drop noticeably without touching focal quality.
Adaptive rendering adjusts dot density based on what each zone actually needs. A hybrid pass architecture lets detail areas run high resolution while backgrounds use fewer passes. Smart background compression conceptually models a 10 to 25 percent ink reduction in low detail zones. We’ve seen this approach protect margins on large format jobs without any visible quality loss.
How Should a B2B Buyer Evaluate UV Printer Resolution Specifications?
Most spec sheets list big DPI numbers but skip the real details. Always confirm native DPI vs interpolated DPI before trusting any resolution claim. We’ve seen buyers pay premium prices for interpolated numbers that real hardware never delivers. Check grayscale levels next, because more levels mean smoother gradients on actual jobs.
Ask the vendor for max speed at resolution data across different substrate types. A strong substrate profiling system shows the machine adapts to real production materials cleanly. We recommend confirming firmware resolution control flexibility before any purchase decision. Automation capability tied to resolution switching tells you how smart that machine truly runs daily.
MTuTech production notes for UV printer software
For buyers comparing UV printer software options, the strongest ranking signal is not only the definition of the process. The page should also explain machine fit, production limits, material behavior, ink or fixture requirements, and the next page a buyer should read before requesting a quote.
Best machine fit
Use this guide together with RIP Software when the job requires stable UV output, repeatable setup, and production-ready print quality. If the work involves different shapes, materials, or order sizes, compare it with UV Printer before choosing the final printer.
Production checklist
- Confirm the printable area, part height, and fixture or rotary requirements before quoting the job.
- Match ink, primer, and curing settings to the substrate so adhesion and scratch resistance are predictable.
- Standardize artwork preparation, white ink layers, and test prints before moving into batch production.
- Track production cost by ink use, setup time, rejects, and finishing steps instead of looking only at printer price.
Related MTuTech resources
FAQ
Which MTuTech printer should this article connect to? The best next page depends on the material, shape, and production volume. Flat products usually start with UV printer or UV Printer 9060 pages, while bottles, tumblers, and round products should connect to rotary, cylinder, tumbler, or cylindrical printer pages.
What should buyers check before ordering? Buyers should confirm print size, material compatibility, white ink needs, fixture design, curing performance, maintenance expectations, and whether the workflow supports repeatable production rather than one-off samples only.
How Do You Build a DPI Optimization Strategy for Your Production Line?
Step 1: Define Visual Tolerance
Start by setting acceptable microtext clarity limits for your most common job types. Brand color tolerance defines how much shift clients actually accept before complaining. We’ve found that shops skipping this step waste time chasing perfection nobody asked for. Knowing your tolerance range makes every resolution decision faster and smarter.
Step 2: Benchmark Substrate Behavior
Test resolution performance across acrylic, PVC, aluminum, and glass before locking any profile. Each material reacts differently to the same DPI setting every single time. We’ve run these tests and found aluminum needs tighter dot control than PVC consistently. Benchmarking first removes guesswork from your daily production decisions completely.
Step 3: Measure What Actually Moves
Track reprint rate, ink consumption, and throughput per shift as your core numbers. These three signals reveal where your current resolution settings hurt output most. We’ve helped shops cut reprint rate just by adjusting resolution profiles on specific substrates. Real data beats assumptions every time on the production floor.
Step 4: Standardize Resolution Profiles
Build resolution profiles that connect directly to your operational KPIs for each job type. Lock those profiles into your RIP software so operators stop making manual guesses daily. We’ve seen standardized profiles cut setup time significantly across busy production shifts. Consistent profiles protect quality and keep your throughput numbers moving forward steadily.
What KPIs Measure Whether Your DPI Strategy Works?
A DPI strategy means nothing without numbers to back it up. Reprint ratio percentage tells you directly where resolution mismatches hurt production most. We track ink usage per m² across job types to spot waste patterns early. Rising ink usage on simple jobs usually signals a resolution setting problem nobody noticed.
Head replacement interval shortens fast when DPI runs too high unnecessarily on every job. We’ve watched customer complaint rate drop after shops standardized resolution profiles by substrate type. Color delta E consistency measures how stable your color output stays across long production runs. Healthy throughput per shift numbers confirm your DPI settings match real production demand cleanly.
Common DPI Mistakes in UV Printing Operations
Upscaling artifacts appear when shops push software resolution beyond hardware limits daily. Ink over saturation follows right after, creating muddy layers that cure unevenly every time. We’ve traced both problems back to one root cause wrong DPI settings for the job type. These two mistakes alone account for a large chunk of avoidable material waste per shift.
Substrate mismatch happens when operators run the same profile across completely different materials. Banding issues show up fast on rigid substrates when pass settings don’t match surface texture. We’ve seen over curing crack delicate ink layers on thin PVC when the energy load stayed too high. ICC misalignment quietly shifts color output and nobody notices until the client calls upset.
DPI vs Image File Resolution (PPI): What Business Owners Confuse
Most business owners send print files without understanding the full resolution chain. PPI controls pixel density inside the raster file resolution before printing even starts. The RIP software then reads that file and maps it against printhead capability next. We’ve seen great looking screen files print blurry because the scaling ratio broke somewhere mid chain.
A weak resampling algorithm inside the RIP stretches pixel data beyond clean recovery points. That gap between file input and hardware output kills effective print resolution on the substrate. We always check where resolution loss enters the chain file, RIP, printhead, or surface. Fixing the right stage saves reprints without touching the original artwork file at all.
Future Trends in UV Resolution Technology
Single pass UV printing is shifting how production lines handle high volume resolution demands. 1200 DPI industrial uv printer heads now deliver detail levels that multi-pass systems struggled to reach before. We’ve watched adaptive droplet firing technology adjust dot placement mid job based on substrate feedback in real time. That kind of live adjustment was simply not possible five years ago on production floors.
AI RIP optimization will soon auto select resolution profiles based on job complexity without operator input. Inline spectrophotometer sensors already read color output live and flag drift before waste builds up. Closed loop calibration connects that sensor data back to the RIP and corrects settings automatically. We expect these three systems to fully merge into one unified resolution control layer very soon.
Why Choose Mtutech Printer Resolution in UV Printing
Most UV print buyers want hardware Mtutech Printer delivers resolution engineering instead. The native printhead architecture maps dot placement with precision most standard machines skip entirely. Gray scale control lets each job run at the exact detail level the substrate actually needs. We’ve built calibration workflows around this approach because guessing dot behavior wastes real money fast.
The substrate calibration system adjusts resolution response before production runs even begin properly. Industrial stability keeps output consistent across long shifts without manual intervention slowing things down. Automation ready firmware connects resolution profiles directly to job queues without operator adjustments each time. Throughput performance balance means clients get speed and quality without sacrificing either one on the floor.
FAQs
What is the ideal resolution for UV printing?
The ideal UV printing resolution runs between 720 DPI and 1440 DPI. Prints viewed under 3 feet need 1080 DPI minimum for sharp detail. Higher DPI raises ink cost per m² noticeably on large runs.
Is it better to print at 300 DPI or 600 DPI?
600 DPI suits prints viewed within 3 feet for sharp brand detail. 300 DPI handles large formats viewed beyond 6 feet cleanly. Doubling DPI increases ink consumption by roughly 20 to 35 percent per job.
Is 600 DPI the same as 600 PPI?
600 PPI measures pixel density inside your digital file before printing starts. 600 DPI measures physical dot placement on the substrate by the printhead. Mismatching both creates upscaling artifacts and raises reprint costs on production runs.
What is better quality, 300 DPI or 1200 DPI?
1200 DPI produces finer detail for prints viewed within 12 inches closely. 300 DPI maintains clean output for displays viewed beyond 8 feet easily. Running 1200 DPI unnecessarily increases printhead wear rate and shifts cost per m² higher.
What is the best DPI for print quality?
The best DPI matches viewing distance to dot density for each job. 720 to 1080 DPI covers most commercial UV print applications cleanly. Correct DPI selection protects gross margin and reduces reprints across every production shift.
Ready to Optimize Your UV Print Resolution for Maximum ROI?
DPI is not just a print setting it is a margin control mechanism your production line runs on daily. Wrong resolution choices inflate ink density, raise cost per m², and quietly shrink gross margin shift after shift. Mtutech Printer helps production teams treat resolution as a profit multiplier, not a guessing game. Think of it this way: ROI of DPI optimization equals cost savings plus throughput gain plus reprint reduction, divided by your optimization investment. That formula drives cost predictability and production yield control across every job type. Asset utilization improves when resolution profiles match real output needs from the start. Operational scalability follows naturally once performance governance replaces manual guesswork on the floor. Cost leakage stops when DPI decisions connect directly to measurable business profitability targets every shift.