
Most print shops lose money on acrylic substrate jobs. They blame the ink. They blame the UV printer. But the real problem starts before printing even begins. Low dyne level and poor surface energy break ink adhesion silently. Nobody checks outgassing on cast acrylic until bubbles appear mid-job. Skipping IPA cleaning, corona treatment, or adhesion promoter before printing costs you reprints every time. We caught one shop losing 30% of acrylic jobs just from skipped prep steps alone.
Your RIP software must match your CMYK configuration and ICC profile perfectly. Wrong ink density settings crush your color gamut before output starts. A spectrophotometer catches color drift that your eyes miss completely. Bad Z-axis calibration ruins printhead height and throw distance together. Always use a media thickness sensor to catch acrylic thickness variance early. Poor vacuum hold-down on the flatbed platen shifts panels mid-print. That single shift creates head strike prevention failures and damages printheads fast. Run the ASTM D3359 adhesion test before committing any full production batch.
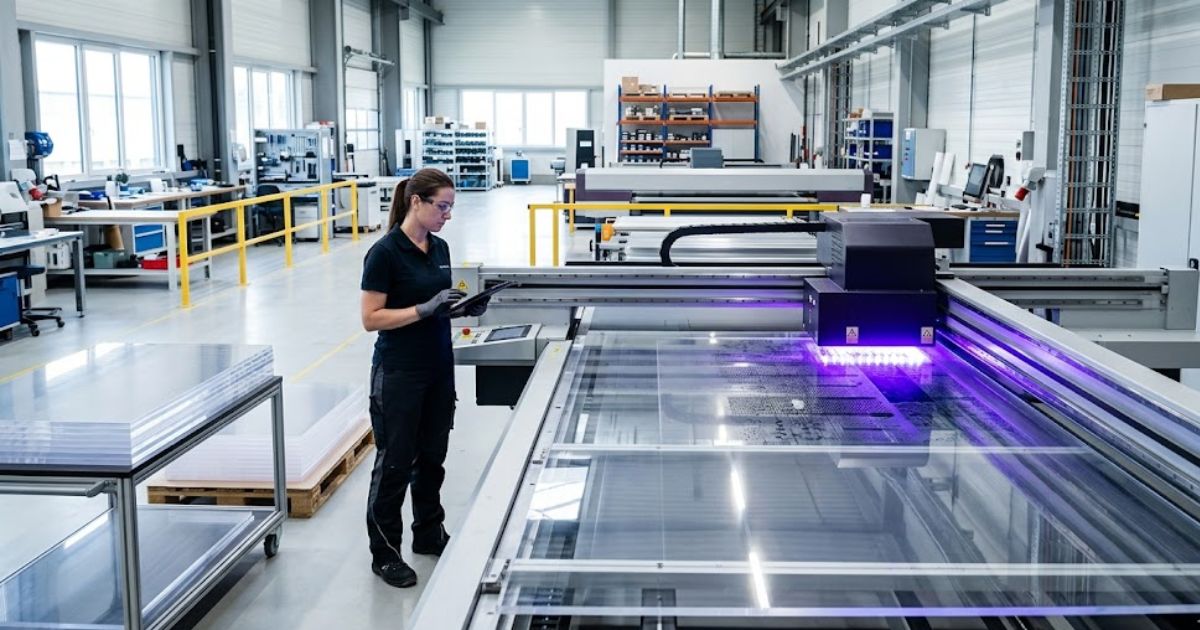
Common UV Printing Problems on Acrylic (With Fixes)
Three Zones Where UV Printing on Acrylic Actually Breaks Down
Zone 1: Color Failure
- Problem: Colors look dull or faded on acrylic prints.
- Root Cause: Low ink density and a mismatched ICC profile shift your color gamut before printing even starts. Substrate whiteness in acrylic also changes how light reflects, making colors appear washed out. Your RIP software may be sending wrong color data to the printer.
- Fix: Increase your ink limit settings inside your RIP software. Load the correct ICC profile for your acrylic substrate. Use a spectrophotometer to verify color output matches your target values.
Zone 2: Adhesion Failure
- Problem: Ink peels, flakes, or won’t bond to the acrylic surface.
- Root Cause: Low surface energy means your dyne level is too weak for UV-curable ink chemistry to grip. Outgassing from cast acrylic releases trapped gases during UV curing, lifting ink off the surface.
- Fix: Clean every sheet with IPA (isopropyl alcohol) before printing. Apply an adhesion promoter to raise surface bonding strength. Use corona treatment to boost your dyne level to the right range for ink adhesion.
Zone 3: Precision Failure
- Problem: Prints come out blurry, soft, or show unwanted ink drop satellite marks.
- Root Cause: Acrylic thickness variance changes the gap between your material and printhead. This throws off your Z-axis calibration, altering printhead height and throw distance mid-job. A shifting flatbed platen without proper vacuum hold-down makes it worse.
- Fix: Measure each acrylic sheet before printing. Re-calibrate your Z-axis calibration to correct printhead height for that exact thickness. Lock every sheet flat using your vacuum hold down system on the flatbed platen.
Diagnose & Fix Common UV Print Failures on Acrylic
| Entity | Problem | Fix |
| Substrate Preparation | Top cause of all print failures | Clean acrylic with IPA before every run |
| Surface Energy | Ink beads up and peels off | Use adhesion promoter or primer coat |
| Z-Axis Calibration | Causes banding and blur | Calibrate before every acrylic job |
| UV Lamp Intensity | Ink stays soft and scratches off | Check lamps for full ink curing |
| ICC Profile / RIP Software | Colors shift on acrylic substrate | Load correct profile before printing |
| Print Head Alignment | Double lines and color output gaps | Run alignment test before large jobs |
UV Curing Explained (Under Curing vs Over Curing)
Wrong curing settings quietly kill your production margins. A single bad batch means reprints, and reprint costs can eat 15–20% of your job budget fast. We’ve watched clients lose outdoor signage durability guarantees because curing dwell time was never dialed in correctly.
Inside Common Problems (With Fixes)
A tacky surface is your first visual clue something went wrong. Run a manual scratch test next, and you’ll likely see scratch resistance loss right away. We always follow that with a cross hatch adhesion test using ASTM D3359 standards to confirm tape peel failure before the job ships.
- Ink delamination shows up fast on outdoor signs, cutting expected durability from 3–5 years down to months.
- Over cured acrylic starts showing yellowing on clear sheets, and most shops blame the material. What’s really happening is molecular degradation inside the polymer chain itself. Heat stress builds up fast, leading to micro fracture patterns and reduced impact resistance that no client wants on a finished sign.
Keeping Your Lamps Honest
UV lamps lose power long before they burn out. Output drops quietly job after job until ink stops curing right. Measure UV intensity every 500 hours with an irradiance meter. Don’t wait for visible failures.This keeps curing even across every sheet and protects ink film thickness on every run
Most Common Mistakes to Avoid in Acrylic UV Printing
Running Maximum Speed for All Jobs
Many shops push pass count low to finish jobs fast. We’ve seen this shrink ink droplet size below ideal picoliters, cutting curing dwell time short. Less dwell time means UV light never fully bonds ink to acrylic. That kills bonding depth and raises your nozzle clog rate fast.
| Factor | High Speed | Balanced Speed |
| Print Quality | Low | High |
| Throughput | High | Medium |
| Profit Margin | Drops fast | Stays healthy |
Adhesion compromise shows up later as peeling or flaking. Rushing every job costs more in reprints than the time you saved.
Incorrect Media Height Settings
Z-axis calibration is something we check on every single job setup. One wrong setting causes a head strike, where the printhead physically hits the acrylic sheet. A single head strike can cost $800–$2,500 in printhead replacement alone. Add downtime for alignment recalibration time, and one mistake eats your whole day’s margin. Most acrylic UV printing mistakes trace back to skipping the media thickness sensor check. That small step blocks big losses before they start.
Step by Step Guide to Print on Acrylic with a UV Printer
We follow a tight SOP during every active print run. Our team logs each checkpoint directly into the inspection log in real time. Running an adhesion test mid job catches weak bonding before panels ever ship. That one step blocks costly reprints and protects client trust.
After printing, we run a backlit uniformity test across every finished acrylic sheet. Uneven glow signals an ink density drop somewhere in the run. We then score each piece on the scratch hardness scale to verify surface durability. Pre-production validation starts the process right, in process control keeps it steady, and post production inspection closes it clean.
Advanced Tips to Improve UV Print Quality on Acrylic
Static Control Measures
- An ionizer bar placed before the print zone kills surface charge fast.
- Attach a grounding strap to your printer frame every single shift.
- Electrostatic charge deflects ink droplets mid air and creates banding lines.
- Anti-static spray on the media surface stops droplet drift before printing.
MTuTech production notes for UV printing applications
For buyers comparing UV printing applications options, the strongest ranking signal is not only the definition of the process. The page should also explain machine fit, production limits, material behavior, ink or fixture requirements, and the next page a buyer should read before requesting a quote.
Best machine fit
Use this guide together with UV Printer when the job requires stable UV output, repeatable setup, and production-ready print quality. If the work involves different shapes, materials, or order sizes, compare it with Flatbed UV Printer 2513 before choosing the final printer.
Production checklist
- Confirm the printable area, part height, and fixture or rotary requirements before quoting the job.
- Match ink, primer, and curing settings to the substrate so adhesion and scratch resistance are predictable.
- Standardize artwork preparation, white ink layers, and test prints before moving into batch production.
- Track production cost by ink use, setup time, rejects, and finishing steps instead of looking only at printer price.
Related MTuTech resources
FAQ
Which MTuTech printer should this article connect to? The best next page depends on the material, shape, and production volume. Flat products usually start with UV printer or UV Printer 9060 pages, while bottles, tumblers, and round products should connect to rotary, cylinder, tumbler, or cylindrical printer pages.
What should buyers check before ordering? Buyers should confirm print size, material compatibility, white ink needs, fixture design, curing performance, maintenance expectations, and whether the workflow supports repeatable production rather than one-off samples only.
Anti-static flooring and a properly sized HVAC system cut room charge levels. We’ve seen shops skip both and watch colors shift mid run without any clue why. Good environment control equals repeatable print output every time.
Storage Requirements for Acrylic Sheets
- Vertical stacking against a padded wall keeps sheets flat and stable.
- Horizontal stacking without center support builds serious warping risk fast.
- Keep protective masking film on until the sheet enters the print bed.
- Even a micro warp causes head strikes that destroy your printhead.
A HEPA filter in your storage room blocks dust from settling on sheet edges.Dusty or soft edges under the film bend during printing and cause real damage.
When Should You Add Protective Coating Layers?
- Clear varnish works well for indoor signage with light daily contact.
- High touch surfaces need stronger abrasion resistance coating every time.
- Outdoor UV resistance coating protects prints from sun fade and moisture.
- Hospitality use case panels take the most wear, so coat them always.
| Surface Type | Coating Needed |
| Indoor display | Light clear varnish |
| Outdoor signage | Full UV resistance layer |
| High touch surfaces | Heavy abrasion coat |
Applications of UV Printing on Acrylic
| Application | Ink Configuration | Thickness Range | Key Risk |
| Indoor signage | CMYK + white | 3–5 mm | Scratching |
| Backlit panels | CMYK + double white | 5–8 mm | Opacity inconsistency |
| Awards/trophies | Reverse print | 10–20 mm | Alignment errors |
| Retail displays | Multi-layer | 3–10 mm | Edge chipping |
When UV Printing on Acrylic Is Not Suitable
UV printing on acrylic works great, but not for every job. Extreme heat exposure above 160°F softens acrylic and cracks the ink layer fast. Flexible substrates like vinyl or fabric bend after printing and break the UV bond completely. Honest shops say this upfront, and that’s exactly what we do.
Budget sensitive projects with very tight margins rarely survive the material and setup cost. High impact environments like warehouses or loading docks physically crack acrylic sheets under pressure.
Operational Checklist Acrylic UV Printing Master Control Sheet
Pre-print validation catches problems before a single drop of ink fires.
- Confirm media thickness matches Z-axis setting exactly.
- Check ink levels and shake white ink channels fully.
- Verify room humidity sits between 40 and 60 percent.
- Run a nozzle check print and inspect it closely.
During Print monitoring keeps quality locked through the full run.
- Watch the first pass for banding or droplet drift signs.
- Check head clearance stays consistent across the sheet.
- Log any color shift directly into your inspection record.
Post print QC closes the job before anything ships out.
- Flex test one corner to check adhesion bond strength.
- Hold the finished panel against a backlight for uniformity.
- Score surface on scratch hardness scale before approving.
We’ve used this exact three phase framework on every production run. Skipping even one step is where most shops quietly lose money.
FAQs
What are the disadvantages of UV printing?
UV printing causes brittleness in thin acrylic sheets under stress. Lamp cost adds up fast with mercury based systems. Ink can crack if the substrate flexes even slightly.
How to prep acrylic for UV printing?
Always do a full IPA wipe before loading any sheet. Static removal stops dust from bonding to the surface. Clean acrylic holds ink far better and cures stronger.
What is the lifespan of a UV print?
Indoor UV prints last around 3 to 5 years with normal care. Outdoor UV prints hold up the same timeframe with a protective coating layer applied correctly.
Does UV printing scratch off?
UV ink with low cross link density scratches off more easily under pressure. Higher cross-link formulas bond deeper into the acrylic surface. We always recommend testing scratch hardness before full production runs.
Do UV printers need ventilation?
Mercury lamp UV printers release ozone during operation and need active airflow. LED UV systems produce far less ozone overall. We always recommend proper room ventilation regardless of lamp type used.
Still Facing UV Print Failures? Talk to a Specialist Today
Still facing UV print failures? A quick consultation with an MTU Tech printer specialist covers ink adhesion issues, Z-axis calibration, banding diagnosis, curing settings, RIP software configuration, and ICC profile setup before a single job goes wrong. Our MTU Tech printer team audits surface preparation, runs an equipment check, reviews substrate compatibility, and delivers a full print quality assessment on your acrylic substrate setup. That one MTU Tech printer expert review protects your production margins, cuts reprint costs, and gives you real troubleshooting support built around your job-specific setup so color output problems stop costing you clients in Toronto and the GTA.
Commercial Buyer Notes for printing on acrylic with UV printers
This topic matters because shops improving acrylic print quality, adhesion, and commercial output. A post can rank for an informational keyword and still support a commercial page when it answers the practical questions a buyer asks before requesting a quote. For MTuTechPrinter.com, this article should guide readers toward the right production path instead of competing with the main product page.
The best audience for this page is award makers, signage shops, display producers, and custom product businesses. These visitors are usually not looking for a basic definition only. They want to know whether the workflow fits their products, whether the machine can handle the job repeatedly, and what problems they should avoid before investing in equipment.
Best-fit buyer scenarios
- Acrylic awards where buyers care about repeatability, realistic cost per job, and a production process that does not collapse once order volume increases.
- Clear signage where buyers care about repeatability, realistic cost per job, and a production process that does not collapse once order volume increases.
- Display panels where buyers care about repeatability, realistic cost per job, and a production process that does not collapse once order volume increases.
- Decorative product inserts where buyers care about repeatability, realistic cost per job, and a production process that does not collapse once order volume increases.
Production checks before choosing a printer
- Static control should be tested on the same materials, blanks, inks, and finishing conditions the shop will use for paid orders.
- White ink layering should be tested on the same materials, blanks, inks, and finishing conditions the shop will use for paid orders.
- Primer testing should be tested on the same materials, blanks, inks, and finishing conditions the shop will use for paid orders.
- Edge handling should be tested on the same materials, blanks, inks, and finishing conditions the shop will use for paid orders.
How This Article Supports the Main Product Pages
The primary commercial path from this article should lead to UV printer. Readers who are comparing related workflows can also review UV printing applications. This keeps the blog post useful as an educational asset while passing topical relevance to the commercial pages that should rank for buyer-intent terms.
For search engines, this creates a cleaner hierarchy: the blog post handles long-tail questions, application details, mistakes, workflow checks, and comparison language; the product page remains the main destination for machine specifications, inquiry intent, and conversion. That structure helps reduce keyword overlap and gives Google clearer signals about which page should own the commercial keyword.
Internal linking recommendation
When this article is referenced from future content, use natural anchors such as “printing on acrylic with UV printers”, “commercial printing on acrylic with UV printers workflow”, and “buyer guide for printing on acrylic with UV printers”. Reserve exact commercial anchors for the product page, especially when building external guest posts or high-authority references.
Decision Table for Commercial Use
| Use case | Key check | Why it matters |
|---|---|---|
| acrylic awards | static control | Use this as a buying signal before choosing the final printer workflow. |
| clear signage | white ink layering | Use this as a buying signal before choosing the final printer workflow. |
| display panels | primer testing | Use this as a buying signal before choosing the final printer workflow. |
| decorative product inserts | edge handling | Use this as a buying signal before choosing the final printer workflow. |
What Makes This Topic Easier to Rank
The easiest ranking angle is not to repeat broad product-page copy. The stronger approach is to answer specific buyer questions around setup, mistakes, material fit, cost control, workflow, and production risk. Those long-tail topics usually create impressions earlier than broad head terms, especially in the United States where buyers compare several suppliers before contacting a manufacturer.
This article should therefore be used as a support asset: keep the language practical, connect it to real production decisions, and link clearly to the right MTuTech Printer page. Over time, impressions from these long-tail phrases can help the site build topical authority and send more qualified visitors toward the pages that matter commercially.